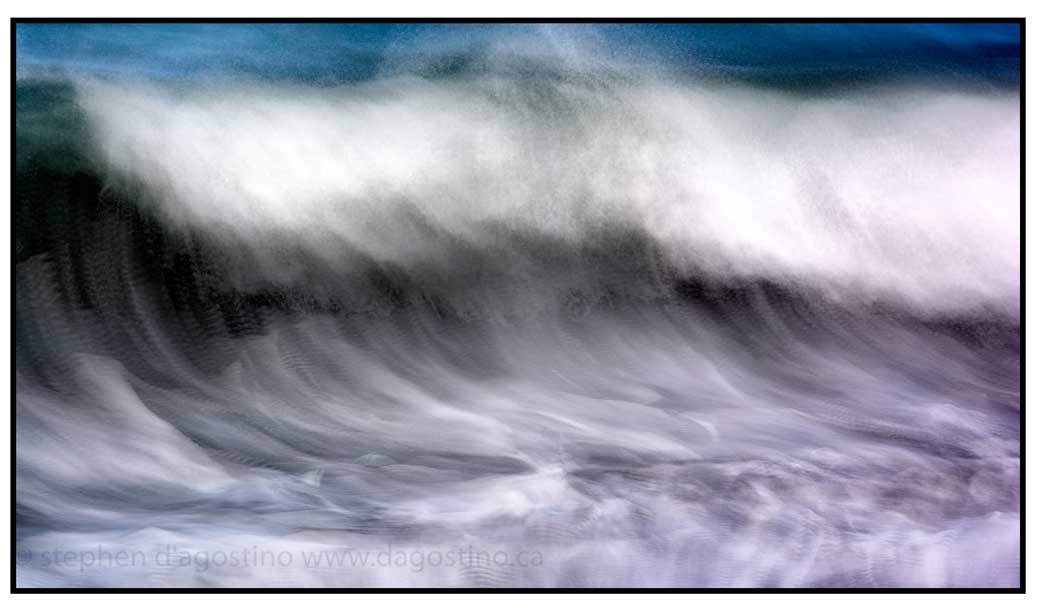
There is a balance in impressionist photography between the moment you remember and the precise instant of the photograph. My exploration has focussed on finding approaches that expand time to become that moment. Opacity Blend Image Stacking produces a result that comes close to that balance. This is what I do.
1. create the stack using Lightroom

- The images for this photo impressionistic wave were shot at 60 fps using Nikon’s N1 V3. I shoot hand held being careful to maintain a constant point on the subject even though the camera is panning. The images are then imported into Lightroom.
- The images are then selected for the stack. The more images you use, the more impressionistic the effect.

- Right click to reveal the menu then select + .
- Since I often use Starcircleacademy’s Advanced Stacker app to create additional texture I also export the images to a separate folder at this point.
2. digital darkroom in Photoshop
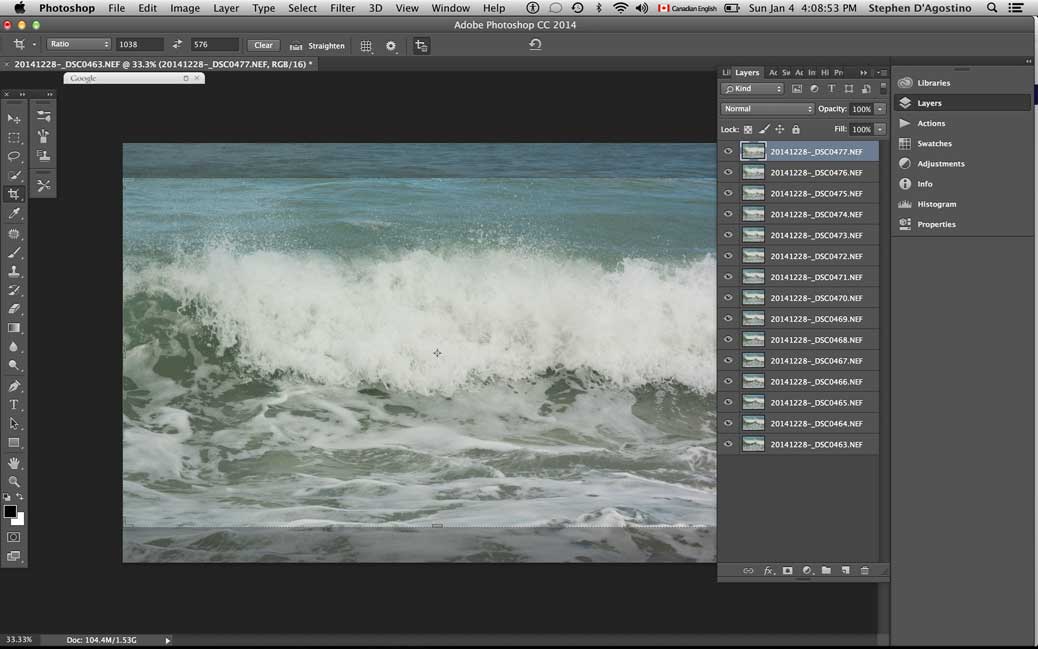
- In Photoshop the stack has to be blended to produce the base image. A good blend can be achieved by starting at the bottom of the stack and then reducing the opacity of the layer above it by about 50% until you reach 3-5%. Don’t be mechanistic with this step. Creativity with opacity significantly impacts on the finished result.

- I merge the stack after balancing the opacity to produce a manageable file size. Note the blend results in a flat image. I address that later in my workflow.

- If I am going to use the Advanced Stacker App I run it here and then drag the layer over to my stacked image for blending. Note that the App is really just another opacity blend using the lighten mode. In doing so I find it often emphasises movement.

- Again I opacity blend until I am happy with the image.

- The more traditional darkroom work begins at this point. I colour balance using the black point/white point/midpoint technique.
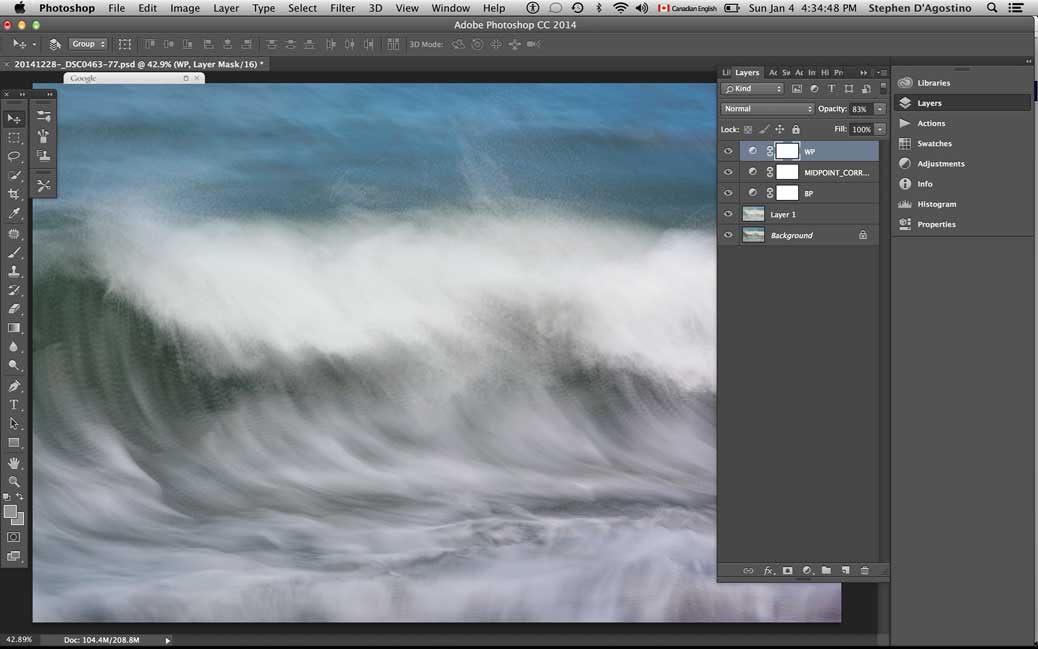
- Often the black point/white point layers have to be balanced.

- The process to this point has produced a flat lifeless image as a result the image averaging that has taken place. I add dimensionality to my photo impressionistic images using Nik’s Pro Contrast filter.
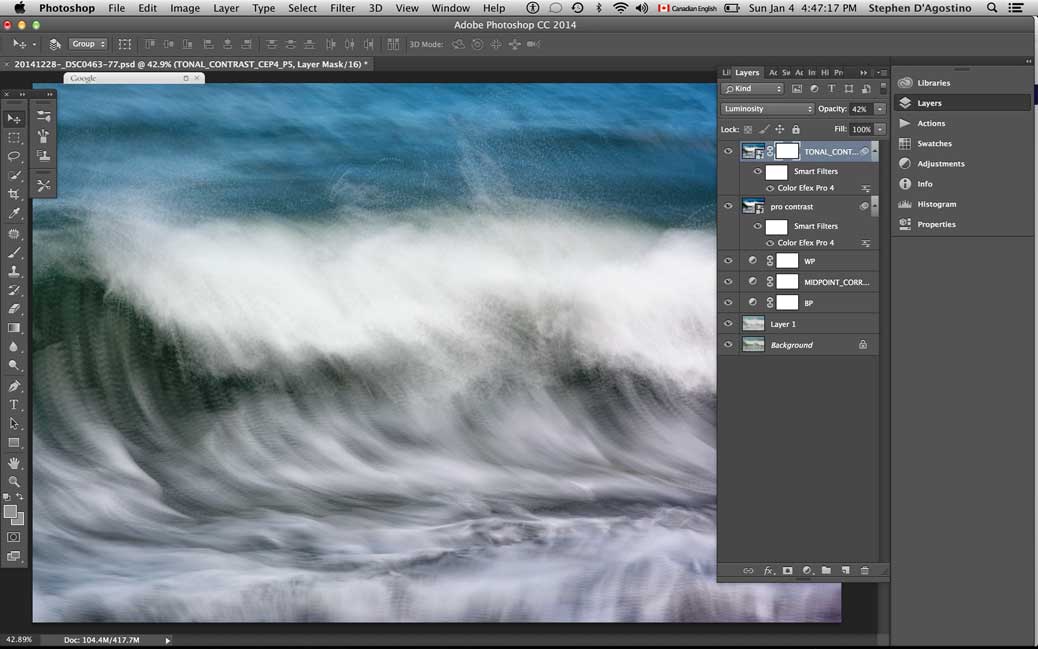
- I add dimensionality using Nik’s Tonal Contrast filter.

- The last step for me is to further dimensionalise the image using Vincent Versace’s Midtone Contouring action. This action is a variant on the Photoshop High Pass filter.

- While many photographers crop at the beginning of their darkroom process to reduce the file size, I like to see what emerges and crop based on the results.
3. the final image